The Enterprise supports most commonly used applications. FaxPress Enterprise users are responsible for providing the source file name with the correct file extension (e.g., .doc, .pdf, etc.). If the file extension does not match the source file, unexpected fax output or file conversion errors may occur. Users should NOT submit "non-convertible" source files (e.g., .exe, .bin, etc.) to the FaxPress Enterprise server. Instead of generating garbage fax output, FaxPress Enterprise will reject the file and generate a file conversion error for that job.
Output files from applications that support Shell execution methods are generally supported as attachments. If you need to confirm your attachment works with FaxPress Enterprise, follow these steps:
| 1. | Select the file in Windows Explorer. |
| 2. | Right click to display the context menu and verify that the Print option is displayed. |
If the print option is not present, FaxPress Enterprise will not support the attachment.
Select Print. If the application prints, then it’s likely supported by FaxPress Enterprise.
Faxes can be previewed using the Preview Fax button in FaxPress Plus’s Send Fax window.
The preview function allows you to view your faxes before sending to confirm all cover page, content and transmission information is correct.
Previewing the fax also confirms that the FaxPress Enterprise will be able to successfully convert any attached files to faxable format. To preview the fax before sending, click the Preview Fax button.
Fax Preview works with NT class machines (NT/XP/2000/2003/Vista) but not with Windows 95/98/ME.
To attach one or more files to your fax, follow these steps:
| 1. | In the Send Fax window, click the Attachments tab.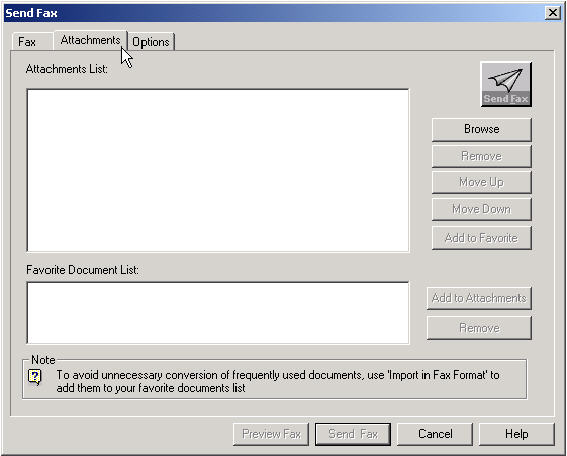 |
If the file you’d like to attach exists in your Favorite Document List, select it and click Add to Attachments.
| 2. | To add an attachment not in your Favorite Documents list, use the Browse button to find the attachment, select it, and click Add. |

| 3. | The attachment will then appear on your Attachments list in the Attachments window. |
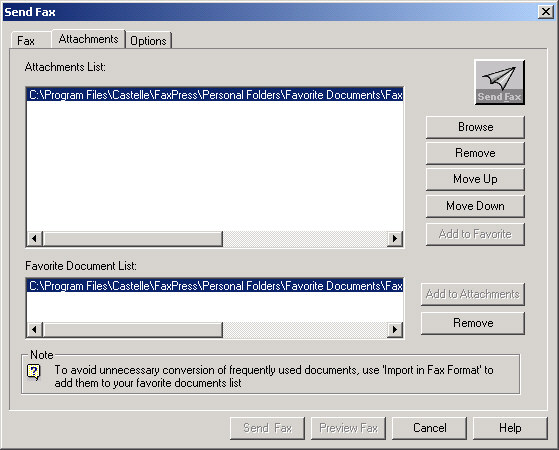
| 4. | Use the Remove button to remove items from the Attachments List. |
| 5. | If you have multiple attachments and want them to appear in a particular order, use the Move Up and Move Down buttons to arrange the items listed in the Attachments List. |
To select a recipient from one of your address books, follow these steps. Click on the To... button in the Send Fax window to open the Address Fax window. In the Address Fax window, select a recipient or groups of recipients from the corporate phone book, from your personal Enterprise phone book or a local phone book linked to your workstation. 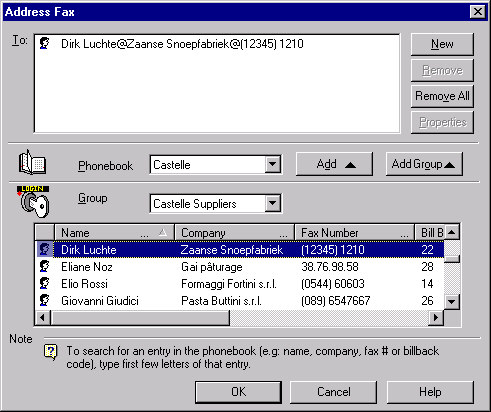
You can also address a fax—with full FaxPress Enterprise address parameters—to a party who is not yet listed in a FaxPress Enterprise phone book by clicking New. This pulls up the New Recipient window. See Adding New Recipients to your Phone Books .
Phonebook—Displays the name of the FaxPress Enterprise phone book currently open. The default phonebook is set in the Options window.
The Personal (remote) phone book is your exclusive mailbox phone book.
Group—The name of the phone book group currently open. If you select a group name from your phonebook, you can broadcast your fax to any number of recipients.
Phone book Members—Lists the fax recipients associated with the selected phone book group.
Name—The last and first name of the group member as listed in the recipient’s profile. You can arrange the group entries in alphabetical order by name by clicking on the Name button.
Company—The company name of the recipient listed in the recipient’s profile. You can arrange the group entries in alphabetical order by company by clicking on the Company button.
Fax #—The recipient’s fax number as listed in the recipient’s profile. You can arrange the group entries in fax number order by clicking on the Fax # button.
Bill Back Code—The bill back code assigned to the recipient as listed in the recipient’s profile. You can arrange the group entries in order by bill back code by clicking on the Bill Back Code button.
Recipient List—The list of selected recipients the current fax will be sent to.
Add—This button places the selected recipient in the Phone book Members list in the Recipient List.
Add Group—This button places all of the members in the current group in the Recipient List.
New—This button opens the New Recipient window to allow you to enter FaxPress Enterprise fax address information for the party to whom you want to send a fax.
Remove—Deletes the selected entry from the Recipient List.
Remove All—Deletes all entries in the Recipient List.
Properties—Displays the member profile for the highlighted entry in the Recipient List.
If you have set the user Phonebooks option to use Exchange/Microsoft Outlook contact lists, the following screen is displayed: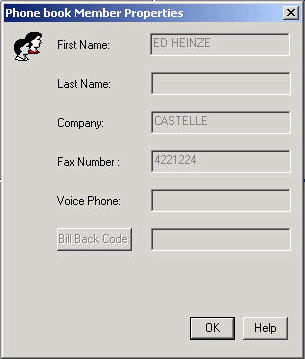
Adding New Recipients to your Phone Books
You can add a new entry to a phonebook by either clicking the New button in the Castelle FaxPress Phonebook window box or by clicking the user icon in the Send Fax window box. Either way, the New Recipient window opens.
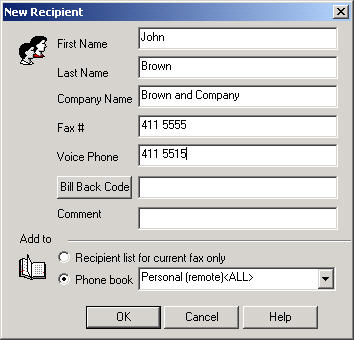
Use the New Recipient window to specify:
First Name— First name of new member
Last Name— Last name of new member
Company Name— The name of the recipient's company
Fax #— The recipient's fax number
Voice Phone— The voice phone number used to reach the recipient
Bill Back Code— The default Bill Back code you assign to the recipient's fax address
Comment— A commentary you want to assign to the recipient's fax address
Add to— Choose one of the following options to add the new recipient:
| ■ | Recipient List for current fax only— Add the details of the new recipient to the To… recipient list edit box in the Send Fax window. |
| ■ | Phone Book— Add the entry to the list of members in the currently selected phone book and to the recipient list shown in the Phone book edit box. You can also use the drop-down list in the edit box to select a different phone book. |
The FaxTray application allows you direct access to the FaxPress server's Send Fax interface from your system tray. To send faxes with FaxTray, the Run FaxTray in system tray option must be selected on your Personal Preferences. (See Setting General Options.)
To send a fax using FaxTray, follow these steps:
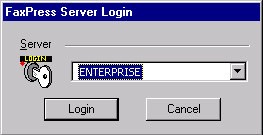
| 1. | Click on the Paper Airplane icon. |

| 2. | In the FaxPress Server Login screen, select a FaxPress server from the scroll down list.. |
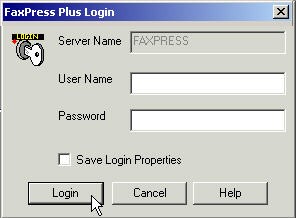
| 3. | In the FaxPress Login screen, enter your user account name and password. Clicking the Save Login Properties Box will bypass this step the next time you login, and automatically open the Send Fax interface. |
|
FaxPress Enterprise & Enterprise Redundant WebHelp
Last Updated: 11/1/2007
E-mail this page |
Castelle 855 Jarvis Drive, Suite 100 Morgan Hill, CA 95037 Toll-free 800.289.7555 Tel 408.852.8000 Fax 408.852.8100 |